It is often hard to get Mautic to work after installing it. That is why I am writing this guide to remind myself of what I need to do to properly install and setup Mautic. The goal is not to let Mautic mess with my head any more than it has already done before writing this guide.
You are welcome to be a part of my journey in getting rid of any unnecessary headache.
Things that gave me the most pain in order of their intensity:
- Cron Jobs
- CORS
Spoiler alert: Code has been cracked.
Things to look out for:
- SMTP
Here are the steps needed to install and setup Mautic properly.
1. Add Domain
I guess adding a new domain or subdomain isn’t something I will need to worry about especially because of using web hosting control panels like cPanel, Plesk, DirectAdmin, and CyberPanel.
Issue SSL
Be sure to issue SSL for the domain or subdomain after they are added. This should be easily done using the the control panel.
2. Install Mautic
Either install Mautic automatically using the installer provided by the control panels or do it manually. Whichever route you choose, make sure that your PHP version matches the one recommended for the Mautic version you will be installing.
Though manual approach is a little difficult, I find the automatic installation may install an old version of Mautic. So, I prefer to do it manually.
2.1 Automatic Installation
Depending on which control panel you are using, you may be able to go to their installer and install Mautic. cPanel provides Softaculous for this purpose, CyberPanel has its inbuilt installer found on the manage website page.
2.2 Manual Installation
This is a four step process. Here are all of them.
2.2.1 Download Mautic
Latest Mautic version can be downloaded from their website at www.mautic.org/download.
Fill up their form and download the software.
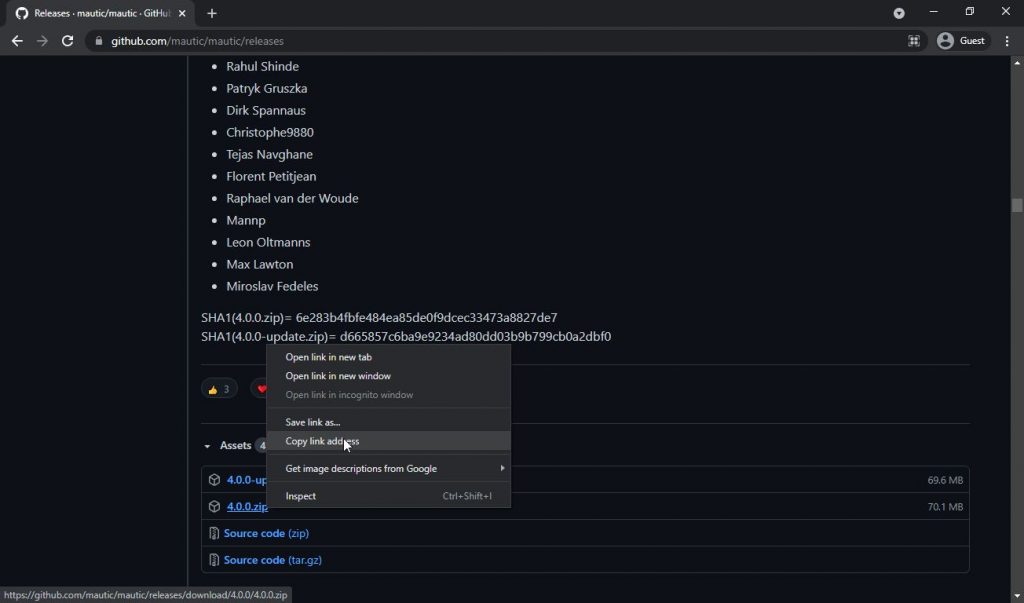
But I like to go to their Github repository then their releases page at github.com/mautic/mautic/releases
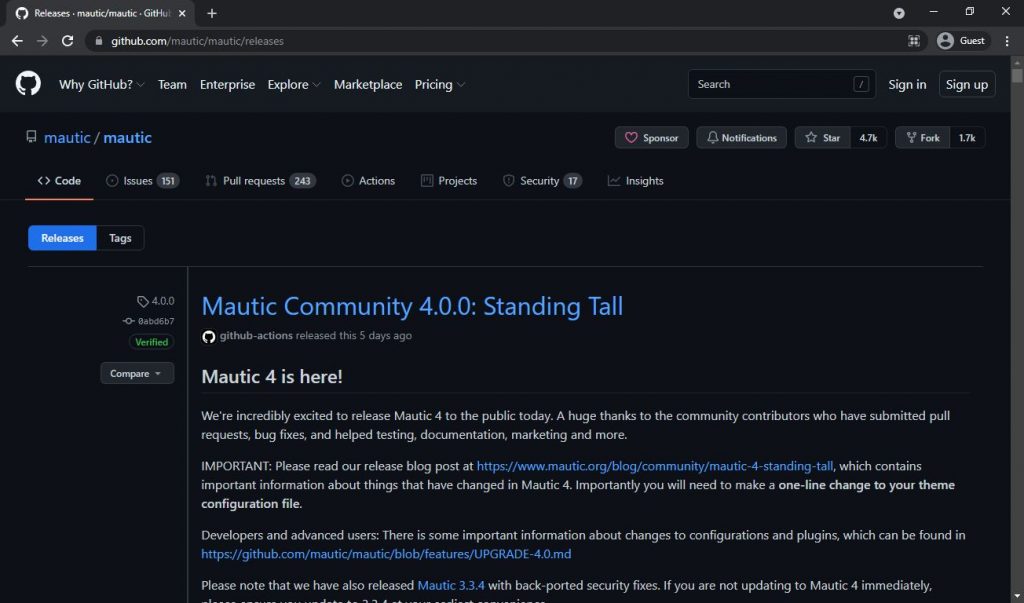
Then go to the end of their latest stable release version details, find and expand their Assets section. Now copy the download link of the file named with the version number followed by the .zip extension.
Going directly to their latest release page at github.com/mautic/mautic/releases/latest may also work but that page may not be up to date following a recent release.
At the time of writing this, the latest version is 4.0.0. So, the latest release download link is:
https://github.com/mautic/mautic/releases/download/4.0.0/4.0.0.zipNow that you have the download URL, you can do one of three things. Either use a File Manager, FTP, or SSH.
Use File Manager or FTP
If you don’t want to go through writing lines of codes, first download the Mautic file from the previous link. Then open file manager from your control panel. Then upload the Mautic .zip file to the root folder of the domain you previously added for Mautic.
If you are using FTP or if your control panel doesn’t provide a file manager, you can upload the Mautic file from your FTP program.
You may also want to remove any other files or folders already present on the root folder.
The root folder is usually the public_html folder inside the folder with your domain name. But if the public_html folder isn’t there, the folder with your domain name should be the root folder.
Use SSH
If you prefer to use your terminal and write a little code, start by accessing your server through SSH.
Then go to the home folder by typing the following command:
cd /homeNow, you can see a list of all the files and folders inside the home folder by using the following command:
lsThis will show you all the domains on your server. Now, use the cd command like before to go inside your domain folder. Remember not to use the / before the folder name once you are already inside the home folder. Your cd command will look something like this:
cd example.com* Be sure the replace example.com with the name of your domain folder.
Now using the ls command, you can see which files and folders are available inside your domain folder.
If you have the public_html folder inside your domain folder, you may also want to go inside that folder with the following command.
cd public_htmlIf you have added a subdomain for using with Mautic, you may find that subdomain folder in any of the folders opened in the last few steps. Open that folder using the cd command like before.
Now, assuming you are inside the root folder of your domain, download the Mautic file using the wget command followed by the Mautic download link like below:
wget https://github.com/mautic/mautic/releases/download/4.0.0/4.0.0.zip* Remember to replace the url with the Mautic download url that you got earlier.
Now, wait until the download is finished. After which, you will see the Mautic file inside your domain root folder.
In case you want to go back to a previous folder at some point just use the following command:
cd ..You can also view which folder you are currently in by using the following command:
pwdAlso, there maybe any files or folders in the domain root folder that you want to remove. In that case, use this awesome guide linuxize.com/post/how-to-remove-files-and-directories-using-linux-command-line/.
2.2.2 Extract Mautic
Now that you already have the Mautic file inside your domain root folder, you can do one of three things once more:
Use File Manager or FTP
After the last step when you uploaded the Mautic file through file manager or FTP, select that uploaded Mautic .zip file and click Extract. Once that is done, you can delete the original Mautic .zip file as you won’t be needing that anymore.
Use SSH
After you have downloaded the Mautic file inside your domain root folder, use the unzip command to extract the Mautic .zip file as follows:
unzip 4.0.0.zip* Be sure to replace 4.0.0.zip with the file name that you have.
After the extraction is completed, you don’t need the original Mautic .zip file anymore. So, to delete the Mautic file, use the unlink command followed by the file name as follows:
unlink 4.0.0.zip* Be sure to replace 4.0.0.zip with the file name that you have.
Tips: After you have already extracted Mautic, you should be able to go through its next setup stages by going to the Mautic domain URL. But if you see any errors, you will need to follow the instructions or go to your server’s error log to fix them. In CyberPanel, I found Permission denied to be a a common error after installing Mautic.
To fix this, go to your CyberPanel dashboard. Now, if you have added your Mautic domain as website, go to Websites > List Websites or if you have added it as child domain, then go to Websites > List Domains. Then from beside your Mautic domain name, click on File Manager. This will take you to the file manager. From there, browse to you Mautic installation directory, usually the directory is either named the same as your Mautic domain or it is the the public_html directory.
3. Installation Steps
At this point your Mautic file is already extracted meaning it is ready to be used. But before you can do that, you need to setup a few things such as connecting Mautic to a database, creating a administrative user, and setting up your email service.
Here is a link from Mautic that will guide you through some of these steps docs.mautic.org/en/setup/how-to-install-mautic/install-mautic-from-package#pre-flight-checks.
Depending on whether you installed Mautic automatically using your control panel or you installed it manually, you will need to go through different steps may it be all three of its steps or none at all. Here is instruction for completing all its steps:
3.1 Database Setup
If you installed Mautic Automatically, you won’t need to bother about this step at all because your control panel would have created a database and attached it to you Mautic installation automatically. But for the rest, here below are the steps to setup a database with Mautic.
3.1.1 Create Database
A perk of manually installing Mautic is that you need to create a database and link it with your Mautic installation.
You should be able to create a database using your hosting control panel very easily. While creating the database, remember to note down the database name, username, and password as these will be necessary in the next step.
3.1.2 Link Mautic to Database
By now, Mautic is installed on your server so you should be able to access its user interface. So, open the Mautic domain url in your browser to start setting up Mautic. There you will be asked to enter your database name, user name and password. You should have these from the previous step.
For the rest of the fields in this step, you can keep them as default.
3.2 Administrative User
Here you will need to enter a username and password that will be used as the login credentials every time you want to log into your Mautic dashboard.
You will also need to enter your name and email address. These aren’t used for sending emails or things like that. So, you can use your own info here.
3.3 Email Configuration / SMTP
This is where you need to enter information that will be used for sending emails from Mautic.
The name field represents who the mail is from when someone receives an email sent from Mautic.
The email field represents the email address that Mautic uses to send out emails. This email address may need to be authenticated with the email provider that you will use to deliver the emails. This of your email provider’s details and credentials need to be filled up in the next few fields in this step.
For the Mailer transport field, select the name of your email provider. If you are using Amazon SES, you need to select Amazon SES -SMTP unless you know that you are using its API service in which case select Amazon SES – API.
Then fill up the rest of the fields with the information from your email provider.
4. Setup Cron Jobs
IMPORTANT: After you have added the cron jobs, be sure to restart your web server. But as it appears, you may also need to reboot you server by typing the reboot command in your SSH terminal.
You will need three mandatory cron jobs to run Mautic properly. And some other optional cron jobs for your specific needs. Each of these cron jobs will basically consist of four mandatory parts and one optional ones.
4.1 Cron Job Structure
Each of the Mautic cron jobs will have four mandatory parts such as frequency, PHP location, Mautic cron folder, and the Mautic cron job itself. Batch limit is a optional part that you can add to your Mautic cron command. In addition to these five, silent execution is another optional part that can be added your cron command.
4.1.1 Frequency
Frequency is how often your cron should run. Starting from every minute to every few years, it is possible to run cron jobs at any frequency.
In short, the frequency consists of five parts with a space in between. Minute, hour, day of month, month, and day of week. An asterisk (*) for any of these parts will mean every. So, an asterisk for the minute, will mean running the command every minute. You can read this guide to learn more about it https://www.howtoforge.com/a-short-introduction-to-cron-jobs
Mautic recommends running three mandatory cron jobs to function properly. They also suggest not running these at the same time so as to not overburden with your server resources.
That’s why they also gave an example of running those three cron jobs with 15 minutes interval but the three runs one after another with a 5 minutes interval in between. It looks something like the following:
0,15,30,45 * * * *5,20,35,50 * * * *10,25,40,55 * * * *Here, the first cron job runs every 0, 15th, 30th, and 45th minutes. The second cron job runs every 5th, 20th, 35th, and 50th minutes. And the last cron job runs every 10th, 25th, 40th, and 55th minutes. This way none of them runs at exactly the same time.
4.1.2 PHP Location
When you are logged in to your server through SSH, type the following command to find out your PHP location:
which phpIt will give you the location of your PHP. It can be different based on the web server or hosting control panel you are using. Here are a few of those locations based on control panel.
cPanel PHP Location
PHP in cPanel is usually located the following location:
/usr/local/bin/phpCyberPanel PHP Location
PHP in CyberPanel is usually located in the following location:
/usr/bin/php4.1.3 Mautic Cron Jobs Location
The Mautic cron jobs location should be the folder of your Mautic installation followed by /bin/console. The Mautic installation folder is the same as the root folder of your domain where you installed Mautic as discussed previously.
You can easily get your Mautic installation folder from your Mautic dashboard. One you are logged into Mautic click on the gear icon ⚙ located on the top right corner to open Settings menu. Then click on Configuration.
Now, in the General Settings section, you will see the Path to the cache directory field having a value similar to the following:
/home/mautic.example.com/public_html/app/../var/cacheFrom this location, the part before /app/ is your Mautic installation folder. Now, append /bin/console to your Mautic installation folder to get your Mautic cron jobs location. It should look something like this:
/home/mautic.example.com/public_html/bin/console* Be sure to replace /home/mautic.example.com/public_html/ with your specific folder.
4.1.4 Mautic Cron Jobs
You will find in this Mautic cron jobs documentation, there are three cron jobs that you will need to set up for Mautic to perform properly. Below are those three jobs:
mautic:segments:updatemautic:campaigns:updatemautic:campaigns:triggerThere are some other jobs listed on their documentation but those are optional though they can be useful for your particular needs. So check out them from this link https://docs.mautic.org/en/setup/cron-jobs#optional.
4.1.5 Batch Limit (optional)
Mautic processes are done in batches of 300. So, if any of its cron jobs deal with say contacts, it will process 300 contacts at a time. But if that is too many for your server or if you want to process more, you can add a batch limit to the cron jobs using --batch-limit= followed by the number you see fit. For a batch limit of say 100, it will look like this:
--batch-limit=100* Be sure to replace 100 with your desired number.
4.1.6 Silent Execution (optional)
This is an optional part for the cron command. That is to say, when a cron job runs, it may output results and even email them to you. That’s why to stop this behavior, use the following:
> /dev/null 2>&14.2 Cron Job Full Command
Now it is time to put all those previously discussed parts together to get the complete cron command. Add all those parts together separating each one with a space.
Here is how the aforementioned three Mautic mandatory cron job commands will look like for different control panel:
cPanel Cron Jobs Example
Here is what your Mautic commands may look like in your cPanel.
0,15,30,45 * * * * /usr/local/bin/php /home/mautic.example.com/public_html/bin/console mautic:segments:update5,20,35,50 * * * * /usr/local/bin/php /home/mautic.example.com/public_html/bin/console mautic:campaigns:update10,25,40,55 * * * * /usr/local/bin/php /home/mautic.example.com/public_html/bin/console mautic:campaigns:trigger* Be sure to replace /usr/bin/php and /home/mautic.example.com/public_html with your specific PHP locaton and Mautic cron jobs folder respectively.
CyberPanel Cron Jobs Example
Here is what your Mautic commands may look like in your CyberPanel.
0,15,30,45 * * * * /usr/bin/php /home/mautic.example.com/public_html/bin/console mautic:segments:update5,20,35,50 * * * * /usr/bin/php /home/mautic.example.com/public_html/bin/console mautic:campaigns:update10,25,40,55 * * * * /usr/bin/php /home/mautic.example.com/public_html/bin/console mautic:campaigns:trigger* Be sure to replace /usr/bin/php and /home/mautic.example.com/public_html with your specific PHP locaton and Mautic cron jobs folder respectively.
To verify that your cron jobs will indeed run, enter one of the cron job commands without the frequency part from the above examples in your SSH terminal then press enter. You will now see whether the terminal displays any error or completes it successfully.
4.3 Add Mautic Cron Jobs
If you are using any control panel, you may easily add your cron job commands from there. But if you aren’t using one or if you want to do it using SSH, you can do that too. Both these options are shown below:
Add Cron Jobs Using Control Panel
From your cPanel, CyberPanel, Plesk, or DirectAdmin, open their cron page and add the commands.
You may see they provide separate fields for each part of the frequency part and another field for the rest of the command. In that case, enter each part in their respective field.
Add Cron Jobs Using SSH
Run the following command:
crontab -eThen if you are prompted to enter a number between 1 and 4, type 1.
Now in the new editing mode that opens up, add all your Mautic cron job commands to the file. Then press Ctrl + O to save the file. Followed by Enter to keep the current file name. And then Ctrl + X to get out of the editing mode.
5. CORS
When setting up tracking with Mautic, you will need to either allow all domains to be able to interact with Mautic, or allow only the domains you want to be able to interact with Mautic.
One you are logged into Mautic, click on the gear icon ⚙ located on the top right corner to open Settings menu. Then click on Configuration.
Now, under the CORS Settings section, for the Restrict Domains option, turn it to No if you want all domains to be able to interact with Mautic. Or turn it to Yes if you want to enter the specific domains that should be able to interact with Mautic.
This is a security feature, so unless you know what you are doing, you should turn Restrict Domains to Yes and provide your list of domains in the valid domains field next to it.
Once you are done setting up the CORS settings, don’t forget to save the settings.
As of now, you have a working Mautic installation. So, you can go to the usual things of setting up your tracking code, forms, emails, segments, and so on.
[BONUS] Update Mautic
If you want to update Mautic from your current version to the latest version or to some other version, you can follow this guide. Be sure to backup your Mautic database before going through the update process to have a safety measure in case anything goes wrong.
By the way, if you are running CyberPanel, make sure to run their upgrade script before upgrading Mautic even if you are already on the latest version of CyberPanel. That’s because they add fixes and updates even to their existing latest version. Here is a link to their upgrade script https://community.cyberpanel.net/t/02-upgrading-cyberpanel/81.
Here is the official guide for updating Mautic to the latest version https://docs.mautic.org/en/setup/how-to-update-mautic/updating-at-command-line. But we will take extra steps to avoid any errors.
Command Structure
In order to run the commands listed below, you will need to follow a similar structure to the cron job commands discussed previously. However, because the following commands aren’t for any cron jobs, you won’t need the frequency part.
For the cron jobs location part, keep it exactly the same. Or browse to the Mautic installation directory from your SSH terminal to only use bin/console instead of the full location.
Then replace the cron job command part with the following commands to get the full commands that you will need to run in your SSH terminal.
Outstanding Database Migrations
Let’s first check if there is any pending database migrations using the following command:
doctrine:migration:statusIf there are any, complete the migrations using the following command:
doctrine:migration:migrateDatabase Schema Updates
Let’s check if your database structure is how it is supposed to be and do necessary modifications if there are any differences by using the following command:
doctrine:schema:update --forceYou can find out more about what these previous commands do from this link https://forum.mautic.org/t/should-doctrinemigrate-and-doctrineupdate-force-ever-be-run-manually/15821/3.
Clear Cache
You may see problems because of having outdated cache files. So let’s clear the cache by using the following command:
cache:clearUpdate Mautic
You can check if there is any updates available by using this command:
mautic:update:findIf there is any, apply the update using the following command:
mautic:update:applyAfter you run this command, you may also be asked to run this command again but after appending --finish to it as such:
mautic:update:apply --finishIf you however want to update to a specific version of Mautic, you can follow this guide https://mauteam.org/mautic/mautic-admins/mautic-update-how-to-dont-click-that-button/.
Repeat Steps
After your Mautic update has been completed, repeat the previous steps to ensure that there isn’t any pending database migrations, database schema is up-to-date, all outdated cache is cleared, and you are on the latest version of Mautic. But if you updated to a specific version without intending to update to the latest version of Mautic, you don’t need to repeat the last step of actually updating Mautic.
After all the previous steps are done, check everything in Mautic to see if they are working fine. If you find any problems, try this guide: https://docs.mautic.org/en/troubleshooting/update-failed.